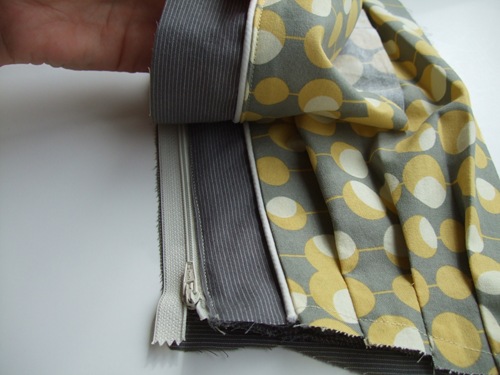
Translate

Tuesday, October 1, 2013

Pleated Pouch Tutorial

DSCF2307
First, print and cut out these four patterns:  one, two, three, four.  Round off the corners if you desire with the circle on the pattern.  I did on my pouch, but you can leave it so it has sharper corners if you’d like.  **The pattern for the pocket is small—you might want to make it bigger.  I think I will next time.  As it is, it fits a standard size credit card, but two pockets side by side might be nicer.**
DSCF2241
DSCF2242
What You’ll Need:
fabric for outer
fabric for lining and band
20” piping, cut into two 10” pieces
9” zipper
interfacing
(all seams are 1/4”)
Cut out your fabric and interfacing according to the pattern pieces you printed off. 
DSCF2245
Take one of your band pieces and line up the raw edge of the piping.  If you are unfamiliar on how to sew on piping, I found a helpful tutorial here on The Cottage Home. I won’t go into as many details here, so if unsure, click on over there!
DSCF2248
You’ll want to stitch just to the left of the stitching already on the piping. DSCF2249
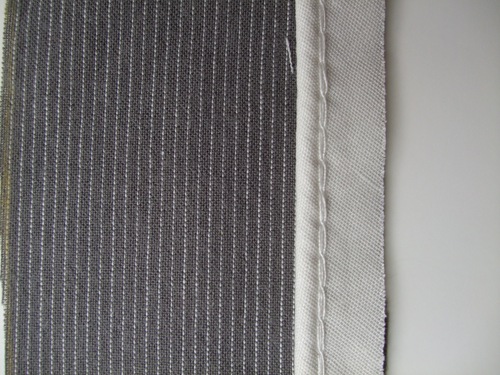
Next line up the band with the 10” edge of one of the outer pieces of fabric, like this.
DSCF2251
Pin, and stitch even further to the left of what you stitched above on the band and piping part alone.DSCF2253DSCF2256
Press the seam down towards the body of the purse. DSCF2257 DSCF2258
You can topstitch at this point.  I think I actually prefer it not topstitched (which is why I left the opposite side without it).DSCF2259 
Repeat previous steps with the other band and piping.  Pin and sew the band onto the other outer piece.
DSCF2267
On the pattern piece with the pleats, instead of marking the pleat placement, I just cut tiny slits where the lines were for the pleats.  You can see them here:DSCF2262   
Now take the fabric to be pleated, and mark a line 1” from the side, as follows.DSCF2268
So when you sew your pleats, since the bag has an angular edge, try and keep the fabric even when folding down.  Like this:DSCF2269
NOT like this:DSCF2270
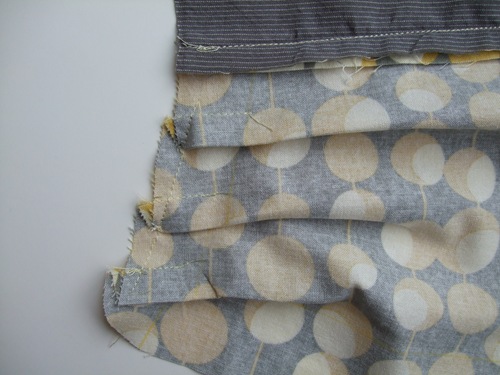
You can see that since it is angled, the pleats don’t match up on the ends.  That is ok!  Just backstitch at the beginning and end of each pleat—ending the pleat at the 1” line you marked.DSCF2271 
After sewing the three pleats on one side, press down and stitch along the edge to hold them in place.  Repeat for the pleats on the other side of the fabric.DSCF2274 DSCF2276
Iron on your interfacing pieces.  The pocket interfacing just goes on half the pocket piece.DSCF2277
To make the optional pocket, fold it in half, right sides together.  Leave a 2-3” opening to turn.  Clip corners and turn.DSCF2278
Topstitch one of the edges for the top of the pocket, then pin it onto the right side of the lining and topstitch around all but the top.
DSCF2279 DSCF2281
Almost done!  Time for the zipper.  Lay one of the lining pieces, right side up.  Then the zipper, right side up.  Lay one of the outer pieces, right side down over that.  Pin, and using a zipper foot, sew the 3 layers together.  See next 5 pictures. 
DSCF2282DSCF2283 DSCF2284DSCF2285 DSCF2286
Now flip over the outer piece, then flip the lining under the outer piece.  Topstitch close to the zipper teeth.  (Next 4 pictures)DSCF2287 DSCF2288 DSCF2289DSCF2291 
Now repeat those steps with the remaining lining and outer pieces.  The next 4 pictures show how to lay your pieces of fabric.   Don’t forget to topstitch as you did above once the outer and lining are sewed to the zipper.DSCF2292 DSCF2293 DSCF2294 DSCF2295 
Now take the two outer pieces of fabric, right sides together.  Flip them to the side and place the lining pieces right sides together.DSCF2297DSCF2298 
Sew lining pieces together, leaving a 4” gap at the bottom for turning.  Make sure not to catch the zipper when sewing the lining pieces.  Just sew to the zipper, otherwise the corners of the bag look wrong when finished.DSCF2299 
Before sewing the outer pieces together, unzip the zipper a bit.DSCF2300
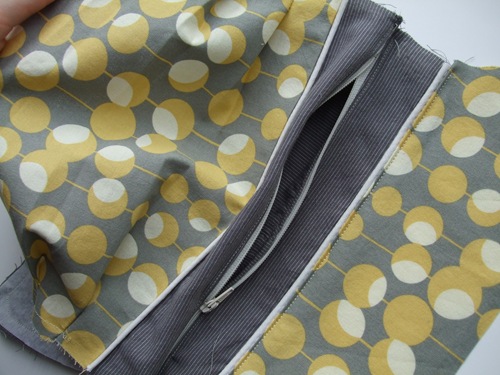
Sew the outer pieces right sides together, like you did with the lining.  Pull the purse through the lining, then sew the gap in the lining closed.  Tuck in the lining, iron the pleats down, and you are finished!
DSCF2305DSCF2316    DSCF2314

Saturday, September 21, 2013

crochet wrap around button baby boots

crochet-baby-wrap-button-hole-boot-sizes
Infant wrap around boots
materials:
caron simply soft yarn
large buttons
G6- 4.25 mm hook (To go up a size use a larger hook, or a larger pattern, to go down a size use an G-4mm hook)
abbreviation:
ch (chain)
sl st (slip stitch)
sc (single crochet)
hdc (half double crochet)
dc (double crochet)
sc2tog (single crochet 2 together)
dc2tog (double crochet 2 together)
dc3tog (double crochet 3 together)
crochet-baby-wrap-button-boot-sole
infant-booties-sole-diagram
sole:
ch 11
row 1- sc in 2nd ch, sc 5 times, hdc 3 times, 7hdc in last ch, finish the rest of the round working along the back of the chain, hdc 3 times, sc 5 times, 4sc in the last/first ch, sl st to the first sc (28)
row 2- ch1, sc in same sc, sc 7 times, hdc, 2hdc 3 times, 3hdc (in one stitch), 2 hdc 3 times, hdc, sc 8 times, 2sc 3times, sl st to first sc (39)
crochet-baby-wrap-button-boot-base-start
shoe:
row 3- ch1, working in back loops, sc around, sl st to first sc (39)
rows 4-5- ch1, sc around, sl st to first sc sc (39)
crochet-baby-wrap-button-boot-base
row 6- ch 1, sc in same sc, sc 9 times, sc2tog, dc2tog, dc, dc3tog, dc, dc2tog, sc2tog, sc around, sl st to first sc (33)
row 7- ch 1, sc in same sc, sc 7 times, sc2tog, dc2tog, dc3tog, dc2tog, sc2tog, sc around, sl st to first sc (27)
row 8- ch 1, sc in same sc, sc 5 times, sc2tog, dc, dc3tog, dc, sc2tog, sc around, sl st to first sc, cut yarn weave in ends. (23)
crochet-baby-wrap-button-boot-left-right
Boot cuff:
for the right boot sl st in the 7th stitch from the seam, for the left boot sl st in the 11th stitch from the seam
crochet-baby-wrap-button-boot-cuff-chain
ch 12
crochet-baby-wrap-button-boot-cuff
row 1- hdc in 3rd ch from hook- ch2 counts as hdc, hdc in next 9 ch, hdc in first sc (the same one you sl st in), hdc 19 times (there will be 3 spaces left), skip 2 spaces, sc in last space. (32)
crochet-baby-wrap-button-hole-boot
row 2- ch2 (counts as hdc), turn, hdc in first hdc and around 28 times, ch 1 skip one hdc, hdc in last 2 (31- with a ch1 space)
row 3- ch2 (counts as hdc), turn, hdc, hdc in ch1 space, hdc around (32)
crochet-baby-wrap-button-boots-shells
row 4 scallops (girls)- turn, 5dc in second hdc, *skip 1hdc, sc in next hdc, skip 1hdc, 5dc in next hdc*, repeat around (8 shells), sc down the side (I fit 5), continuing around sc across the bottom along the original chain (11), sl st, cut yarn and weave in ends
crochet-baby-wrap-button-boots-boys
row 4 simple (boys)- ch1, turn, sc across top (32), down the side (5) and across the bottom chain (11), sl st, cut yarn and weave in ends
crochet-baby-wrap-button-boot-girls-boys

And both the boys and girl versions (again these are the larger size)
crochet-baby-wrap-add-button-boot
Don’t forget to add a button where ever you like and your done! I placed mine at the bottom of the 5th hdc over from the front- I might go lower next time… or maybe two smaller buttons?
crochet-baby-wrap-button-boot-boy
And one final picture, I thought you might want an inside shot so you can see how it wraps a bit… I’m still so very much in love with these boots.
crochet-baby-wrap-button-boot-shell

Crochet Cuffed Baby Booties Pattern


I started playing around with my Crochet Rain Boots pattern and adapted it into these cute little cuffed booties! Enjoy the thepattern and be sure to follow my instructions on where to start, end and join your rounds since it is different than the rain bootspattern!

Always begin your rounds in the same stitch as your chain.

In rounds 2-5 you will end your rounds in the same stitch as your chain. So technically you will be adding an extra stitch to each round. I have found that this helps keep the heal flatter.


Update 10-26-12: A video tutorial for rounds 1-7 is now available on my YouTube channel. I am only allowed to upload 15 minute videos at a time so this all I have so far...  but I think it will help a lot of you out!
 

Crochet Cuffed Baby Booties
Size: 6-12 months

Supplies:
Vanna's Choice® medium worsted weight yarn in two colors
Crochet hook size G-6 (4.0 mm)
tapestry needle for weaving in ends
Buttons for embellishments

Abbreviations:
ch - chain
SC - Single Crochet
HDC - Half Double Crochet
SC Decrease – Single Crochet decrease (I used the invisible decrease)


Starting with color 1
Chain 10, SC in 2nd chain from hook, SC in next 7, make 5 SC in the last chain
Now working on opposite side, SC 8, join, ch 2.
Round 2: HDC, 2 HDC, HDC in next 6, 2 HDC in next 2, HDC in next 2, 2 HDC in next 2, HDC in next 6, 2 HDC, HDC in last, join, ch 1.
Round 3: SC 10, 2 SC in next 2, 2 HDC in next 5, 2 SC in next 2, SC in next 10, join, ch 1.
Round 4:  In back loops only, SC around, join, ch 1. (39 SC)
Round 5: In back loops only, SC around, join, ch 1. (40 SC)
Change to color 2
Round 6: SC around making deep single crochets (40 SC)
Round 7: Now working in both loops, SC around, join ch 1. (40 SC)
Round 8: SC 12, [SC decrease, SC in next 2] 4 times, SC 12, join, ch 1.
Round 9: SC 14, SC decrease, SC, SC decrease, SC, SC decrease, SC 14, join, ch 1.
Round 10: SC 10, 6 SC decreases, SC 11, join, ch 1.
Round 11: SC 10, 3 SC decreases, SC 11, join, ch 1.
Round 12: SC 10, 2 SC decreases, SC 10, join, ch 1.
Round 13-16: SC around, join, chain 1. (22 SC) (at the end of round 16, change color)
Change back to color 1
Round 17: SC around in new color, join, ch 1. (22 SC)
Round 18: HDC around (22 HDC)
Round 19: SC around (22 SC)
Round 20: HDC around (22 HDC)
Round 21: SC around (22 SC)
Round 22: HDC around (22 HDC)
fasten off and weave in loose ends.
Fold over cuff (rounds 17-22)

Optional: Slip stitch around the bottom of the boot to create a thicker rim. I did this along the first “rim” that was created from crocheting in the back loops.

Tiny 5 petal Flower Pattern:
Magic Ring, SC 10 in magic ring, join, chain 1
In next stitch: (HDC, DC, HDC) all in one stitch, chain 1 and slip stitch to next stitch, chain 1 - repeat around.
fasten off and leave tail to sew on