Translate

Saturday, May 17, 2014

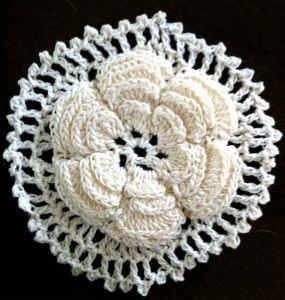
Irish Rose Motif

Skill: Easy
Size: About 4″ round
Materials: Size 10 Crochet Cotton: White (W) – 35 yards.
Crochet Hook: Steel 7 (1.65 mm)
JOINING WITH SCWhen instructed to join with sc, begin with sl knot on hook, insert hook in st or sp indicated, yo and pull up a loop, yo and draw through both loops on hook.
General Starching DirectionsCut a piece of cardboard larger than the article to be stiffened. Cover the cardboard with clear plastic wrap.
Lay the article on the plastic, stretch out and pin into the correct shape.
Generously spray with heavy spray starch. Allow to dry completely.
This method allows for washing and re-starching whenever necessary.
ROSE CIRCLERnd 1: (Right Side) Starting at center, ch 6, sl st in first ch to form ring; ch 1, (sc in ring, ch 4) 6 times; join with sl st to first sc. (6 ch-4 lps)
DO NOT TURN EACH ROUND.
Rnd 2: Ch 1, (sc, 7 dc, sc) in each ch-4 lp around; join. (6 petals)
Rnd 3: * Ch 5, working behind petals, sl st between next 2 petals, rep from * around. (6 ch-5 lps)
Rnd 4: Ch1, (sc, 9 dc, sc) in each lp around, join.
Rnd 5: * Ch 6, working behind petals, sl st between next 2 petals, rep from * around. (6 ch-6 lps)
Rnd 6: Ch 1, (sc, 11 dc, sc) in each lp around; join.
Rnd 7: * Ch 7, working behind petals, sl st between next 2 petals, rep from * around. (6 ch-7 lps)
Rnd 8: Ch 1, (sc, 13 dc, sc) in each lp around, join.
Rnd 9: Rep Rnd 7.
Rnd 10: Sl st in next ch-7 lp, ch 4 (counts as first dc and ch 1), (dc, ch 1) 7 times in same lp, (dc, ch 1) 8 times in each of next 5 ch-7 lps around; join with sl st to first dc. (48 dc)
Rnd 11: Ch 6 (counts as first dc and ch 3), sl st in 3rd ch from hook (picot made), * dc in next dc, ch 3, sl st in 3rd ch from hook (picot), rep from * around, join with sl st to first dc. (48 picots) Finish off and weave in ends.
Finishing- Starch into a 4-inch circle using general starching directions.

Monday, May 5, 2014

Crocodile Stitch Flower

We designed this free Crocodile Stitch Flower to help give a little extra pop to accessories, home decor, and even gift wrappings. You can make these in all the colors of the rainbow and hang them up from a string for a sweet banner decoration. Or whip one of these up and attach them to the top of a specially wrapped. You can even add one to a cute hat for a little splash of color and style. This is one of the quickest and best stash busting patterns you’ll ever come across. Pattern is listed below.
Materials:
  • Small amount of scrap yarn. (This project can be worked in any yarn weight. Gauge is not crucial.)
  • A 1” button of your choosing.
  • Crochet hook size of your preference.
Pattern:
Ch 7, join with SL ST in first CH to form a ring.
Rnd 1 : * CH 10, SL ST in next CH, REP from * around, join with SL ST in first CH – (7 CH-10 loops)
Rnd 2 : [SC, HDC, 8 DC, CH 2, 8 DC, HDC, SC] in first CH-10 SP * [SC, HDC, 8 DC, CH 2, 8 DC, HDC, SC] in next CH-10 SP, REP from * around, join with SL ST in first SC. Fasten off. – (7 petals)
Finishing : Attach a 1” button sewn through the center of the flower. You may also sew Croco-Flower on a brooch setting so it is removable.
We love seeing photos of your finished work, so send us an email with a shot or share them with us through Facebook! Make sure to stay tuned to the blog for more free crochet patterns!

Easter Egg Blanket


The first row of an afghan with homespun or bouclé or other knobby style yarn can be frustrating. This afghan does not require finding chain stitches, even for the first row. The sides are a straight edge, and the top and bottom has a border with a loop edge.
This pattern was designed to be easy for homespun or bouclé style yarns, but it can be made with just about any yarn. Make it in a solid color or with as many color changes as you like.
The example is made in Sensations Rainbow Boucle.
Size: This blanket can be made any size. Five widths are given in the directions.
SizeWidth (Inches)Length (Inches)Ounces of yarnYards of yarn
Extra Small3242.6710.67827.15
Small41.1454.8617.631367.33
Medium50.2967.0526.342042.56
Large59.4379.2436.792852.83
Extra Large68.5791.4348.983798.14
Materials:
Yarn – Sizing given for worsted weight yarn but other weights can be used
Size I (5.5mm) crochet hook
Abbreviations:
ch = chain
ch sp = chain space
dc = double crochet
sc = single crochet
Special Stitches:
Double treble crochet (dtr): Wrap the yarn over the hook 3 times and insert the hook into the space indicated. *Wrap the yarn over the hook and draw it through 2 loops.* Repeat from * to * 3 times to complete the double treble.
Decrease stitch (dec): yo, insert hook in ch sp, yo and pull up a loop, yo and draw through 2 loops on hook, yo, insert hook in next ch sp, yo and pull up a loop, yo and draw through 2 loops on hook, yo and draw through all 3 loops on hook.
Instructions:
Instead of a beginning chain, the blanket is begun with a first row of chain and dtr spaces.
For these widths, start with this number of chain and dtr spaces:
32″ = 28
41.25″ = 36
50.25″ = 44
59.5″ = 52
68.5″ = 60
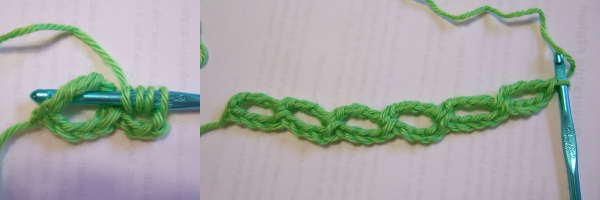
Row 1: Chain 4. Dtr in first chain. This forms the first chain and dtr space. Form each additional space by chaining 4 and doing a dtr on the dtr of the prior space. Make an even number of chain and dtr spaces.
Do not turn.
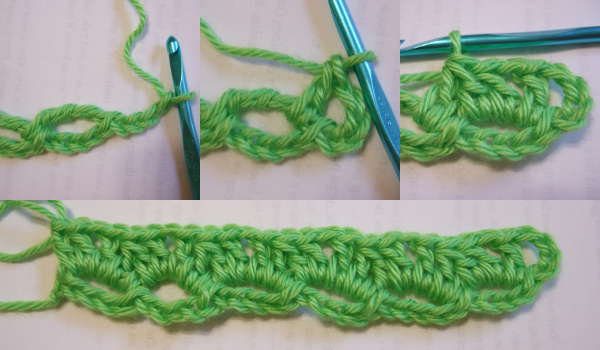
Row 2: Ch 4. Without turning the work, rotate so that the following is worked across the dtr created in the first row. Over first dtr work dc, ch1, dc, dec. The dec will move to the next dtr. Over it and each dtr to the last work dc, ch1, dc, dec. The second part of the last dec will be in the last dtr. On the last dtr, also work dc, ch1, 2dc.
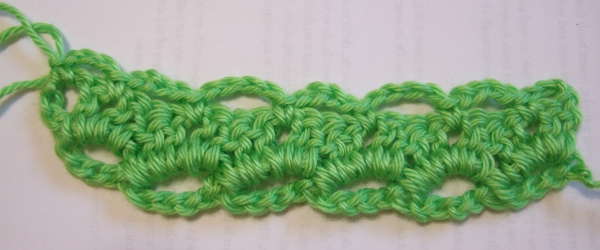
Row 3: Ch 3 and turn. Sc in ch-1 sp. Working across row, ch 4 and sc in each ch1 sp. At the end of the row, ch 3. Sc in the space created by the ch 4 turning chain.
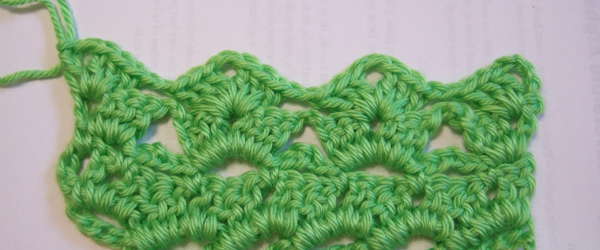
Row 4: Ch4 and turn. In ch-3 sp work 3dc. Working across row ** ch2, skip a ch-4 sp, (3 dc, ch 1, 3 dc) in next ch-4 sp. Repeat from ** across to last ch-4 and ch-3 spaces. Skip ch-4 sp, ch 2. In the last ch-3 sp, work 3 dc, ch-1, dc.

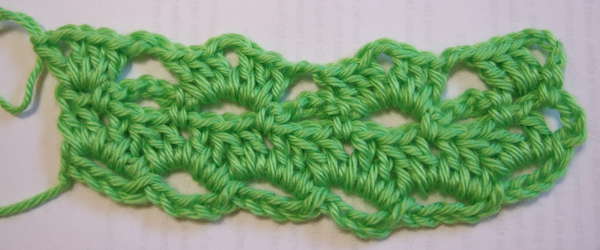
Row 5: Ch4 and turn. In first ch-1 space work 3 dc. Working across row ** ch2, (3 dc, ch1, 3 dc) in next ch-1 sp. Repeat from ** across to last ch-4 space, ch 2. In the last ch-4 sp, work 3 dc, ch-1, dc.
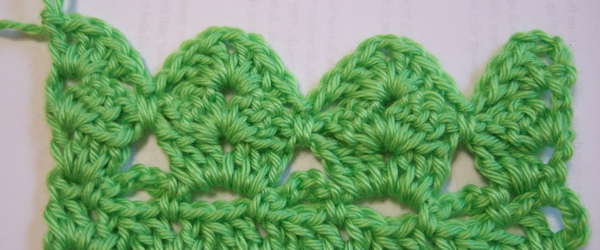
Row 6: Ch4 and turn. In first ch-1 space work 3 dc. Working across row ** ch 1, reach down to ch-2 space below ch-2 space of last row and make a sc , ch 1, (3 dc, ch1, 3 dc) in next ch-1 sp. Repeat from ** across to last ch-4 space, ch 1, reach down to ch-2 space below ch-2 space of last row and make a sc , ch 1. In the last ch-4 sp, work 3 dc, ch-1, dc.
Row 7: Ch4 and turn. In first ch-1 space work 3 dc. Working across row ** ch2, skip (ch1, sc, ch1), (3 dc, ch1, 3 dc) in next ch-1 sp. Repeat from ** across to last ch-4 space, ch 2, skip (ch1, sc, ch1). In the last ch-4 sp, work 3 dc, ch-1, dc.
Repeat rows 5 through 7 until afghan is desired length. End with a row 6 then work these last three rows:
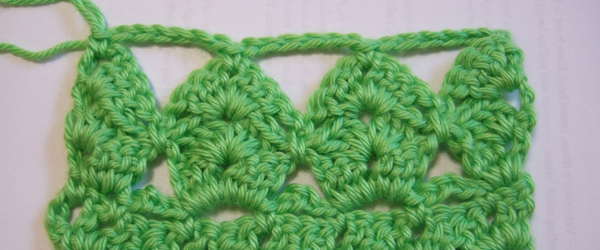
Third to last row: Ch 6 and turn. Skip first ch-1 space. Working across row ** skip (ch1, sc, ch1), sc next ch-1 sp, ch 6. Repeat from ** across to last ch-1 space, ch 6, skip (ch1, sc, ch1). Sc in the last ch-4 sp.
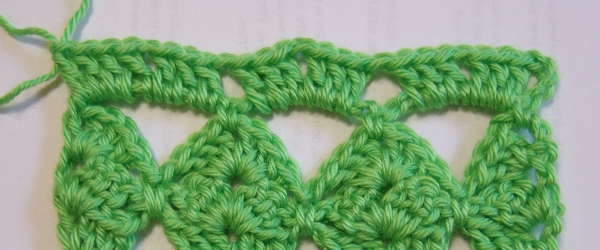
Second to last row: Ch 4 and turn. In each ch-6 space across row up to the last ch-6 sp, work (3 dc, ch 1, 3 dc, ch 1). In last ch-6 sp, work (3 dc, ch 1, 4 dc).
Last row: Ch 4 and turn. Sc in ch-1 sp. Working across row to the ch-4 sp at end of the row – ch 4 and sc in each ch-1 sp. Sc in ch-4 sp at end of row. Finish off and weave in end.
The blanket can be made in a solid color or can be made with any number of color changes. The best way to make a color change is to finish all but the very last pull through of the two loops of the last stitch of a row. Cut yarn with a few inches of tail and join with new color next to stitch. Pull new color through last two loops. Weave in ends.

POLKA DOTS & FRILLS BABY BLANKET

All Folded Up
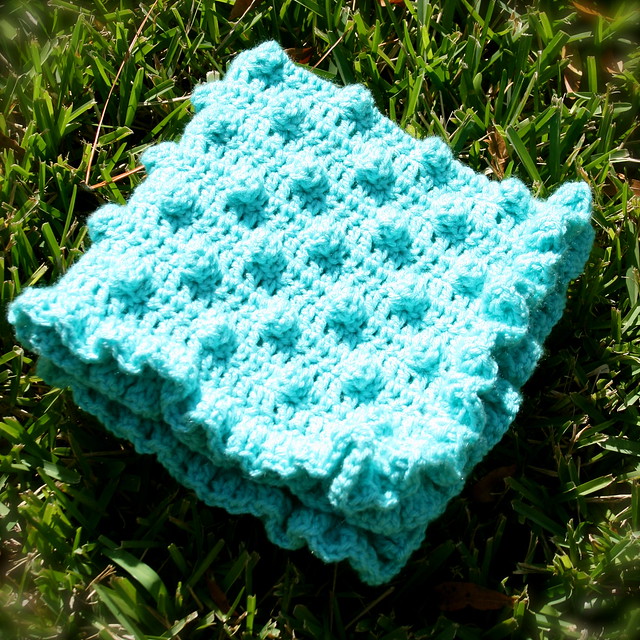
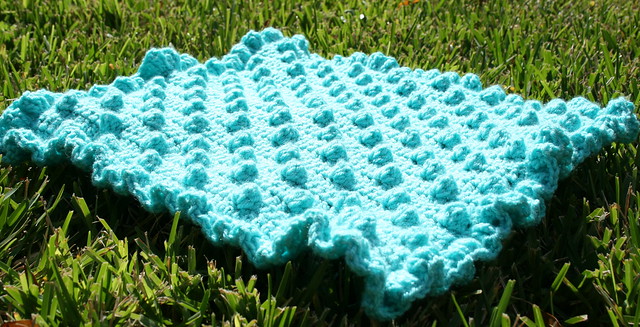
This blanket is super simple. It's perfect for the new crocheter and has a great finished look. You'll need to know how to double, single, and treble crochet. The only tough part is the bobble. I would get it down pat before attempting the blanket.

Here's my version of the bobble instructions:

Bobble: For the experienced crocheter, you're going to TC 4 together in the same st.


If you have no idea what that means, try reading this:
Start a TC in the next st. Instead of pulling the yarn through the last two loops on the hook like you normally would, you're going to leave the last two loops on the hook. Then you'll do the same thing in the same stitch three more times. This means you'll have a total of 5 loops on your hook. Once you've got all 5 loops, yarn over and pull through all the loops.
Here's the pattern I followed using a K hook.

The ch 2 at the beginning of each round does count as the first stitch.

Ch 49 (97, 121).  

Row 1: DC in the third st from hook (so you're only skipping 2) and in each st across. Including the skipped chs, you should have 47 DC (95, 119).  Ch 2, turn.
Row 2: DC in the next 4 sts (you will have 5 DCs since we're counting the ch 2 as the first st), bobble in the next. *DC in the next 5 sts, bobble in next* across. DC in the last 5 sts, being sure you DC in the starting chs. Ch 2, turn.
Row 3: DC in each st across. Ch 2, turn. 
Row 4: Dc in the next st (so you have 2 sts including the ch 2), bobble in the next. *DC in the next 5 sts, bobble in the next* across. DC in the last 2 sts. Ch 2, turn. 
Row 5: DC in each st across. Ch 2, turn. 
Repeat rows 2-5 until your blanket has reached the desired size. 

Frill:
More Frilly Goodness

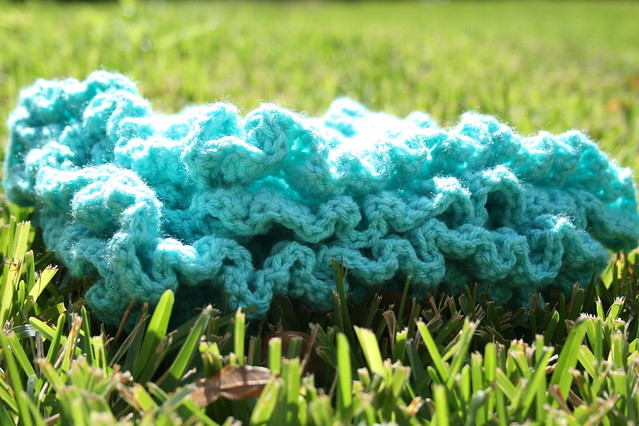
Round 1: SC evenly around all four sides of the blanket. (You can end here if you'd rather not have the frills)
Round 2: Ch 3, 2 TC in the same st, 2 TC in the next st. *3 TC in the next, 2 TC in the next* around. Work 6 TC in each corner.

When I make an afghan for our house, I'm planning on adding the border just at the top and the bottom (think fringe).

Needs a Baby On Top


This blanket is just screaming, "Set a baby on top of me!" I can't wait until our little Caroline makes her appearance in March. 

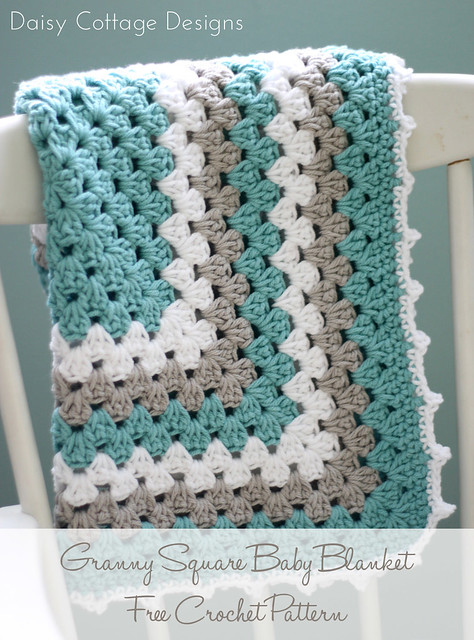
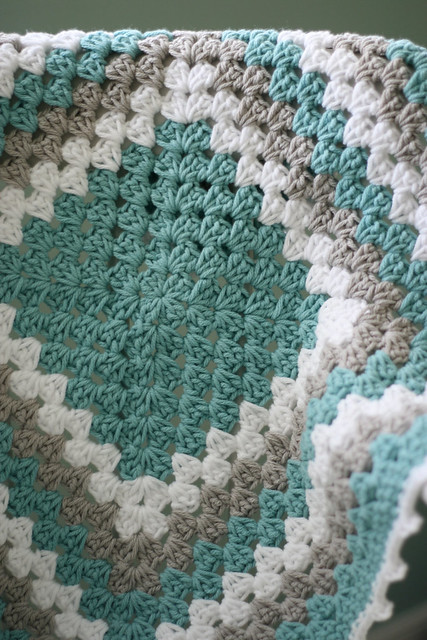
GRANNY SQUARE BABY BLANKET CROCHET PATTERN

Free Crochet Pattern by Daisy Cottage Designs
Materials:
-Lion Brand Cotton Ease yarn in Seaspray, Snow, and Stone.
-I crochet hook
-Scissors and Tapestry Needle

Notes:
-dc cluster = 3 dc into the same stitch
Free Granny Square crochet pattern by Daisy Cottage Designs

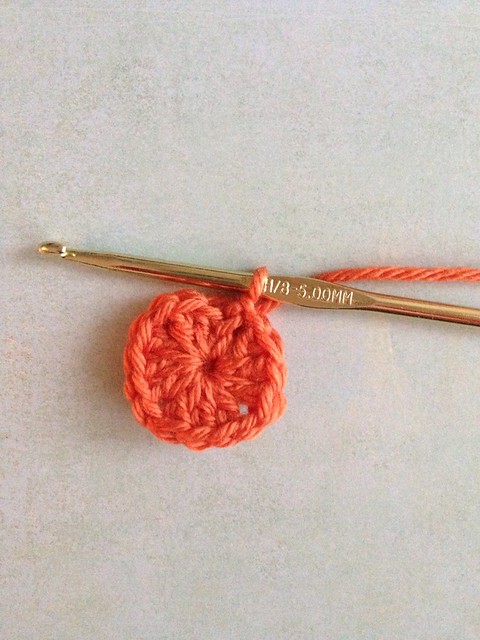
Round 1: Using your first color, ch 3. 2 dc into the first ch, ch 1. *dc cluster into the same stitch, ch 1* 3 times. Sl st to the top of the beginning ch. You will have four dc clusters and 4 ch 1 spaces at the end of this round.


Free Granny Square Crochet Pattern by Daisy Cottage Designs

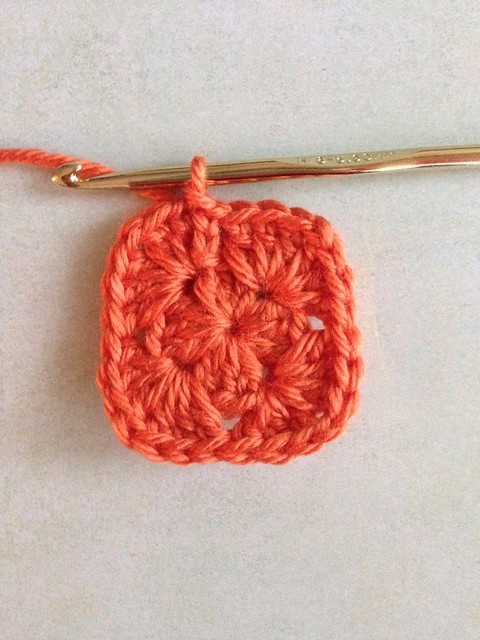
Round 2: Sl st in the next two stitches and into ch 1 space. Ch 2, 2 dc into the same ch 1 space. Ch 1, dc cluster into the same ch 1 space. *dc cluster, ch 1, dc cluster in the next ch 1 space* around. Sl st to the top of the first ch 2. At the end of this round you should have 8 dc clusters and 4 ch 1 spaces.

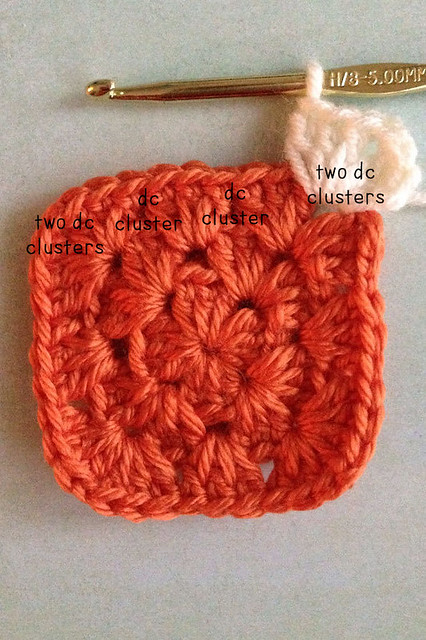
Round 3: Sl st in the next two stitches and into the ch 1 space. Ch 2, 2 dc into the same ch 1 space. Ch 1, dc cluster into the same ch 1 space. Dc cluster into the space between the clusters on the previous round. *dc cluster, ch 1, dc cluster in the next ch 1 space. dc cluster into the space between the clusters on the previous row* around. Sl st to the top of the first ch 2. At the end of this round you should shave 12 dc clusters and 4 ch 1 spaces.

Granny Square Blanket Tutorial Text

For all of the remaining rounds, you will be continuing in the same manner. You will work two double crochet clusters into each corner, with a ch 1 in between them.  You will work 1 dc cluster into each space between the clusters in the previous round. 

When it's time to change colors, cut your first color and weave ends. Join your second color in any of the ch 1 spaces. You will then continue the same pattern with the next color.

For the blanket is shown above, you will do:
     6 rounds of Seaspray
     2 rounds of Snow
     2 rounds of Stone
     2 rounds of Seaspray
     2 rounds of Snow
     2 rounds of Stone
     2 rounds of Seaspray

Border: 
Round 1: hdc around the entire blanket working 3 hdc into each corner stitch. Cut yarn and weave ends. 
Round 2: You'll now be working a picot edging. Join white yarn using a slip stitch  *sc in the next five stitches, ch 3, hdc in the first chain* around. I like to have a picot in each corner so I fiddle with the stitches between picots to make that happen. I used to have a cow if the spaces weren't exact, but I've come to realize that once the blanket is finished, you won't even notice! 

Granny Square Blanket Free Crochet Pattern