Translate

Monday, January 27, 2014

Sew Lotus Skirt


Materials:
  • 1 yard satin (for leaves on top and for leaf apron skirt)
  • tutu
  • child’s or women’s small tank top
Directions:
Sew a Tinkerbell Skirt & Top by The DIY Mommy
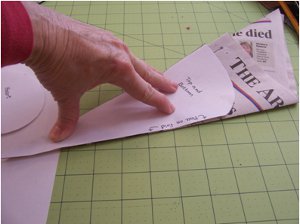
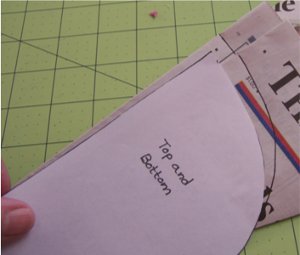
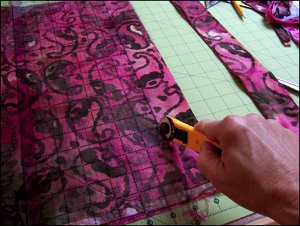
From the satin, cut out a front and back for 4 large petal shapes (mine were 8″ by 7″ and I eyeballed the shape) and 3 smaller petal shapes (mine were 8″ by 7″). Cut out a 6″ wide strip across the entire width of the fabric (your fabric will probably be 54″ to 60″ wide) for the sash.
Sew a Tinkerbell Skirt & Top by The DIY Mommy
Put the petal pieces right sides together, and sew around the two sides. Turn over & press.
Sew a Tinkerbell Skirt & Top by The DIY Mommy
Press the 6″ wide strip in half lengthwise wrong sides together, and then press the two raw, long edges in 1/2″.
Sew a Tinkerbell Skirt & Top by The DIY Mommy
Arrange the larger leaves side-by-side with the top raw edges aligned. Place the smaller leaves on top, over where the larger leaves meet, as pictured above. Pin in place and sew together about 1/4″ from the raw edge.
Sew a Tinkerbell Skirt & Top by The DIY Mommy
Measure your child’s waist to find out how long you want the waistband of the leaf apron to be, and then gather the tops of the leaves to fit. In this case, I wanted the skirt to measure 21″ long.
Sew a Tinkerbell Skirt & Top by The DIY Mommy
Tuck the leaves about 1/2″ into the waistband you’ve previously folded and pressed. Pin (a lot) because satin is slippery!
Sew a Tinkerbell Skirt & Top by The DIY Mommy
Press the short ends of the waistband inwards and press (so there are no raw edges showing on the ends of what will be the tie). Sew the layers together with a topstitch about 1/4″ from the open fold of the waistband, sew the tie ends shut at the same time (as shown below).
Sew a Tinkerbell Skirt & Top by The DIY Mommy
For a matching top, find a green tank top that’s your child’s size (if not, you can do what I did and alter a women’s small tank top by taking in the shoulders and sides). Make small leaves in the same manner as the large leaves made for the skirt (mine measured about 2″ by 3″). Pin them together side-by-side, gather them, and then turn the raw edges in, pin, and stitch to the neckline as pictured above.

Wednesday, January 22, 2014

Sew Table Top for Valentine's Day

Valentine's Day Table Topper

Materials:
  • 1-1/2 yards fabric for top and bottom
  • Scraps or fat quarters in at least 5 different colors/patterns
  • 2-1/2 yards bias tape
  • Fusible felt
  • Steam-A-Seam
  • Pattern Page 1 and Pattern Page 2

    Valentine's Day Table Topper
Instructions:
  1. Print the patterns and cut them out. To make the patterns actual size, use newspaper. For the top/bottom pattern, use a folded piece of newspaper.

    Valentine's Day Table Topper
     
  2. Fold the top right corner down to the bottom left corner and crease.

    Valentine's Day Table Topper
     
  3. Do this one more time.

    Valentine's Day Table Topper
     
  4. Place the fold edge of the printed pattern along the solid fold of the newspaper. Trace the top curve of the pattern and cut along that line.

    Valentine's Day Table Topper

    Valentine's Day Table Toppers
     
  5. Open up and it should look like this:

    Valentine's Day Table Topper
     
  6. Fold top/bottom fabric with cut edges meeting so you'll have a double layer big enough for the pattern. Pin the pattern on and cut out.

    Valentine's Day Table Topper
     
  7. Cut your scraps/fat quarters into 2 inch strips. If you have a rotary cutter and a self-healing mat, stack the fabrics and cut them up all at once. If you don't have one, marking two inches with chalk marks is the easiest way I've found.

    Valentine's Day Table Topper
     
  8. Using 1/4 inch seams, sew together in five strip blocks, mixing up the order of your fabrics. Press seams open.

    Valentine's Day Table Topper
     
  9. Even up the ends of your blocks and cut them into 2 inch strips.

    Valentine's Day Table Topper

    Valentine's Day Table Topper
     
  10. Now sew these strips together in 5 strip blocks (1/4-inch seams again) and press the seams open. Mix up the patterns so that every block looks different. You'll only need 4 blocks, so you might want to save the other strips for another project.

    Valentine's Day Table Topper
     
  11. Trace four heart appliques onto the top side (so it will have the adhesive on it still when the sheets are separated) of Steam-A-Seam. Take the bottom sheet off and iron onto the wrong side of each block.

    Valentine's Day Table Topper
     
  12. Cut out.

    Valentine's Day Table Topper
     
  13. Remove the remaining paper piece from the appliques and position on the table topper fabric. Iron on.

    Valentine's Day Table Topper
     
  14. Sew along edges of appliques with a zigzag stitch. On my Brother, I used a .2 length and 3.5 width.

    Valentine's Day Table Topper
     
  15. Using the top/bottom pattern, cut a piece of fusible felt. Fuse to the top. Pin top to bottom.

    Valentine's Day Table Topper
     
  16. Sew around the outside of the hearts and again on the inside of the zigzag stitches. Free motion quilt on the portions of the top fabric that are showing.

    Valentine's Day Table Topper
     
  17. Finish the edges with bias tape, and you're done!

    Valentine's Day Table Topper

Tuesday, January 21, 2014

Valentine's Day Wall Hanging Quilt

Applique Hearts Quilted Wall Display

 Quilt Size: 8.5 inches wide x 29.5 inches long
Time to complete: Weekend project
Primary Technique: Pieced & Appliqued
Difficulty Level: Easy
MATERIALS:
  • Fabric 1—1⁄4 yard or fat quarter for block background fabric
  • Fabric 2—3⁄8 yard for sashing and appliqué fabric
  • Fabric 3—3⁄8 yard for binding and appliqué fabric
  • Fusible web—1⁄2 yard
  • Backing—1⁄3 yard
  • Batting—12" x 33"
  • Accuquilt die cutting machine
  • Accuquilt Heart - 2," 3," 4" (55029)
  • Accuquilt 5" x 10" mat (55110)
  • Accuquilt Go! Square-6-1⁄2" Quilt Block A (55000)
  • Accuquilt Strip Cutter-1-1⁄2" (55024)
  • Accuquilt Strip Cutter-2-1⁄2" (55017)

INSTRUCTIONS:
Cutting Directions:
Fabric 1:
  • Cut 4—6-1⁄2" squares
Fabric 2:
  • Cut 3—1-1⁄2" strips across the width of fabric (WOF) for sashing
  • Cut 2—4" hearts with fusible web backing
  • Cut 2—3" hearts with fusible web backing
Fabric 3:
  • Cut 2—2-1⁄2" strips across the WOF for binding
  • Cut 2—4" hearts with fusible web backing
  • Cut 2—3" hearts with fusible web backing
Sewing Directions:
  1. Remove paper backings from appliqué shapes.
     
  2. Following diagram, position appliqué shapes on each background fabric 6-1/2" square. Remember to allow for seam allowances. Fuse in place following manufacturer’s directions.
     
  3. Machine appliqué edges of shapes with matching thread and a narrow zigzag or narrow satin stitch.
     
  4. Layout appliquéd blocks according to diagram.
     
  5. Subcut one Fabric #2, 1-1⁄2" strip into three, 1-1⁄2" x 6-1⁄2" rectangles for sashing.
     
  6. Pin and sew rectangles between blocks. Press seams toward rectangles.
     
  7. Pin and sew Fabric #2, 1-1⁄2" strips to sides first, then top and bottom of wall hanging center. Press seams toward strips.
Quilting and Finishing:
  1. Layer batting between wall hanging top and backing.
     
  2. Pin or baste layers together.
     
  3. Model was machine quilted with outline quilting around appliqué shapes and in the ditch around background fabric squares.
     
  4. Add binding, mitering corners, adding a hanging sleeve, if desired, before hand stitching binding to back of wall hanging.

Monday, January 20, 2014

Hair Clipper Holder Tutorial


what you’ll need:
a frame without glass
cardboard insert
fabric (and batting if you wish) cut to overlap cardboard by about an inch
various matching ribbons
and your trusty glue gun
first, make sure you iron your fabric so it’s nice and smooth. no one wants to hang up wrinkly fabric. ew. then line the fabric and batting up, flip over, and…
glue the heck out of it! don’t get your fingers.
fold the corners like a present, or just glue em as best you can like it did. nobody’s gonna see the back, unless they take it off the wall just to nitpick about a messy back. those people should stay away from my house.
lay your ribbon over the top and cut with an inch or two extra to wrap around the back.
pin the ribbons in place.
again, glue gun to the rescue. you know what to do.
pop it in your frame, and tada! you’re done!

Sunday, January 19, 2014

Sew Water Drop Hole Tee Shirt


You’ll need:
a thrifted tee, or some knit (yardage depends on your youngster, most likely 1 yard will be enough)
rib knit (1/4 yard will make quite a few collars)
matching thread (polyester is best for knits)
ballpoint needles (these are specifically for knits)
a tee shirt that fits your child to make a pattern from
First off, make a simple tee shirt pattern.
So. You have that shirt that fits your child, right?
Lay it out, folded in half. I use freezer paper for my patterns-but you could use anything. Even a few pieces of copy paper taped together. (been there…done that)
Trace around your shirt, and make sure to add your seam allowance, whatever that is. (I usually use a 3/8″ seam allowance, just FYI)
This is what it should look like!
Make sure to trace where it dips lower in the front.
Now for the sleeves, trace around like so…
And the curve….then continue the swoop down like the picture shows. The top flat line is the fold, by the way.
 Then cut out your pieces, I cut my bodice pieces on the hem to reuse it. 1 with the back neckline, 1 with the front. Cut two sleeves on the fold.

Then I cut out a small oval to one side of the front neckline.
Then I cut a piece of my rib knit, 42″ (width from selvage to selvage) by 1.5″.  Just make sure the ribs are going vertically along your yardage so it can stretch when you sew it on.
I ironed in both sides 1/4 ” like so.
Then in half to make some “bias” tape. (not cut on the bias but made similarly)
Then take a small piece and pin it around the oval, sandwiching the raw edge.
Then pin and sew ONE of the shoulder seams, right sides together.
It doesn’t matter much, but I sewed the one opposite my little oval cut out.
Then starting at one end of the neckline, pin the tape around the raw edge. Slightly stretch the tape a little between each pin. This will help the neckline retain some shape. Also when you get to the oval cut out, pull the ends together so it makes the keyhole shape and pin well.
Then sew the tape  on, close to the edge.
Next pin and sew the other shoulder seam together.
I tacked down the bias tape seam to the inside of the shirt.
I also pinned and sewed some tape to the edges of my shirt sleeves.
Sorry I didn’t take a picture of this step for this shirt, but here is a pic from another tute:
Pin and sew the sleeves right sides together, into the armholes.
Then pin and sew the sides of the shirt together. Leave a tail at the bottom of the shirt if you don’t like to back stitch over knit…
Cause then you can just tie them in a knot, trim, and be done!
Tada! A cute, easy top with a fun little detail. Thanks for stopping by!