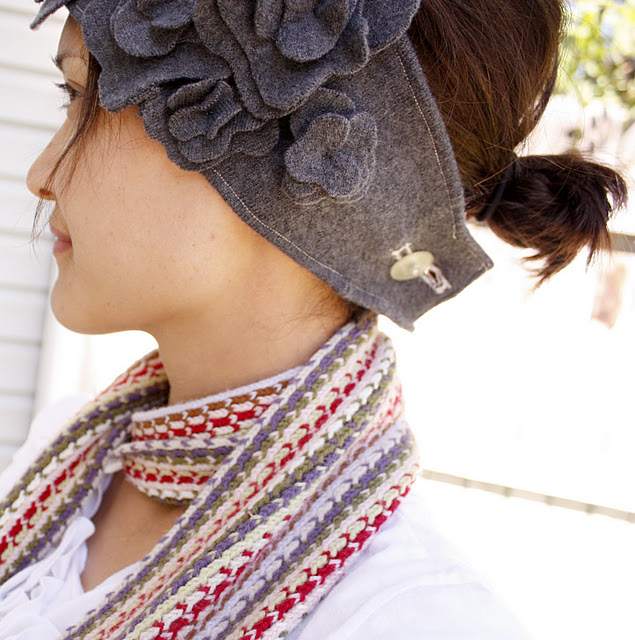
All it takes is an old wool sweater or 1/4 yard of fleece, scissors, thread, and a sewing machine. Pretty simple. For this one I used an old wool sweater that got ruined in the wash and became semi-felted.

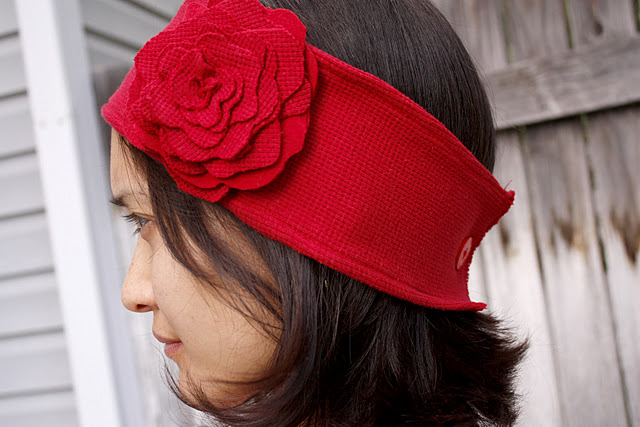
For this one I used a sleeve off an old thermal knit shirt.
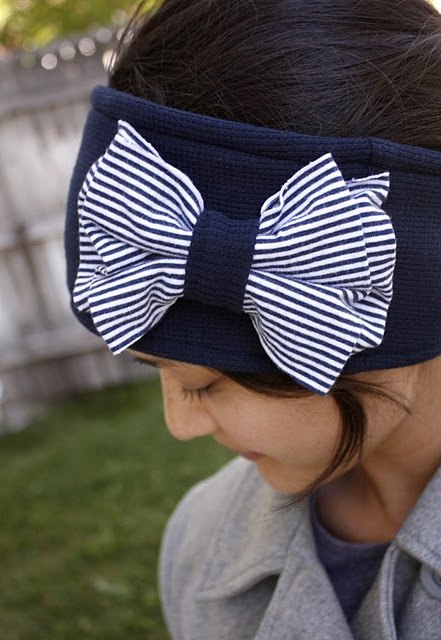
And this one is fleece with a matching knit fabric sewn over it and a nice pretty recycled knit bow.
You’re so excited now right? And can’t you see some cute mini-ear warmers for your tot? You could totally make a boy version too. Check out the full Ear Warmer DIY after the jump, and also visit Delia over at Delia Creates for a lot of other amazing tutes!
And remember to leave Delia a comment, because this week’s favorite commenter wins those gorgeous embroidery patterns pictured up on the left!
DIY Ear Warmers
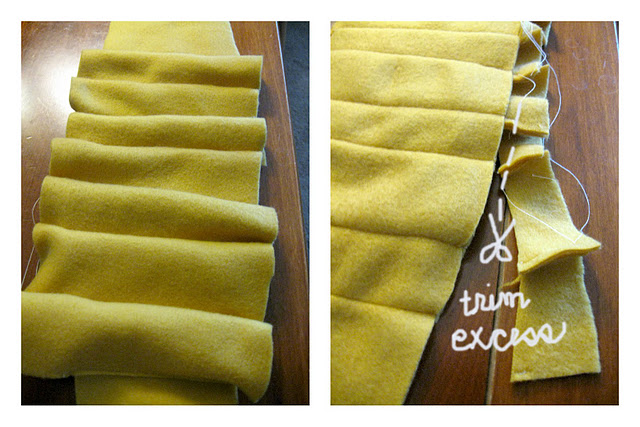
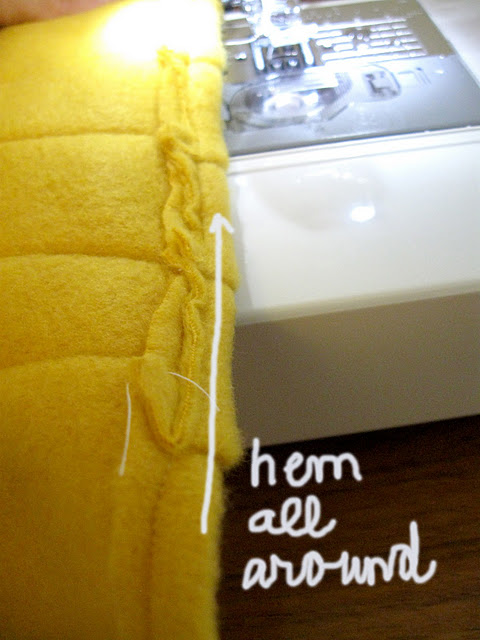
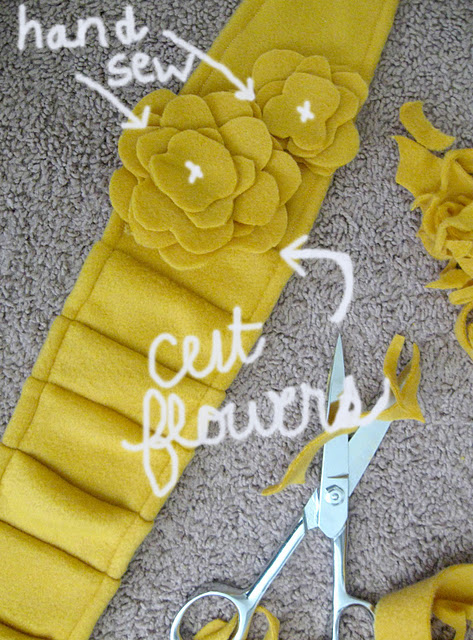
The idea is pretty simple. You start with a piece of felted wool or fleece cut to these measurements:
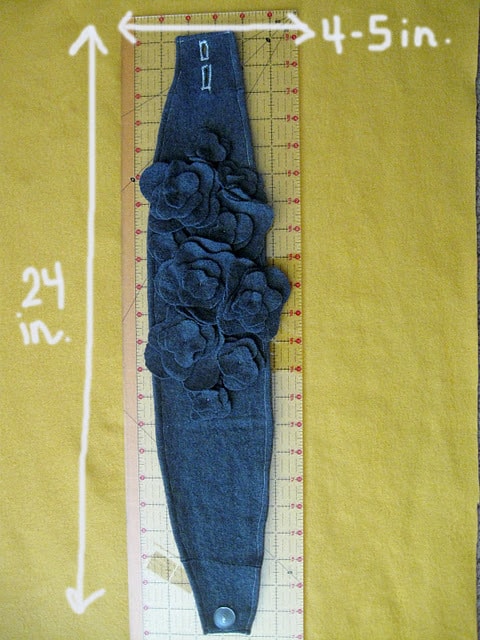
Taper the ends to an ending width of about 1 1/2 inches wide.
Taper the ends to an ending width of about 1 1/2 inches wide.
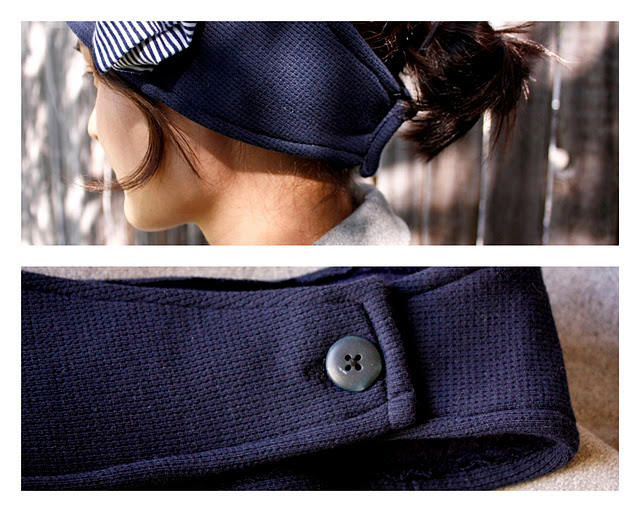
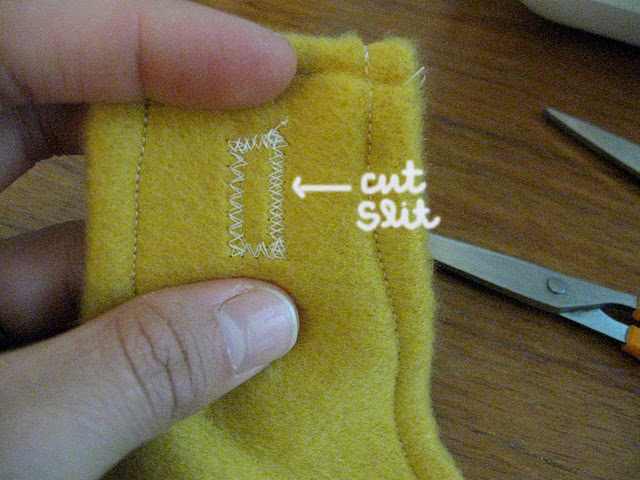
Add a button hole and a button at the ends.
My button hole skills need work but as you can see I just make a rectangle with a zig zag stitch and then cut a slit in the middle of that rectangle.
Embellish to your hearts delight.
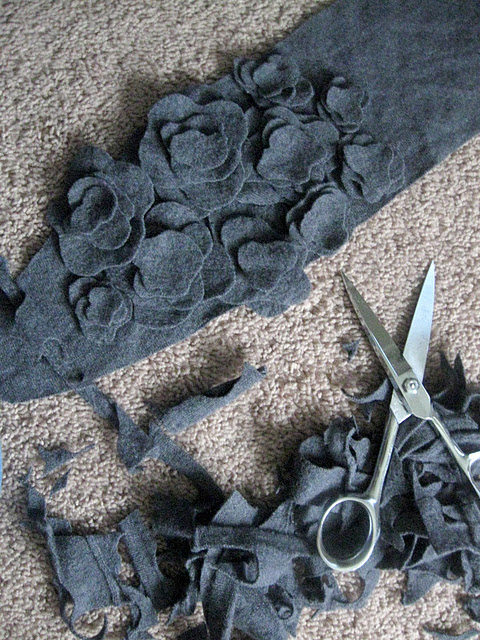
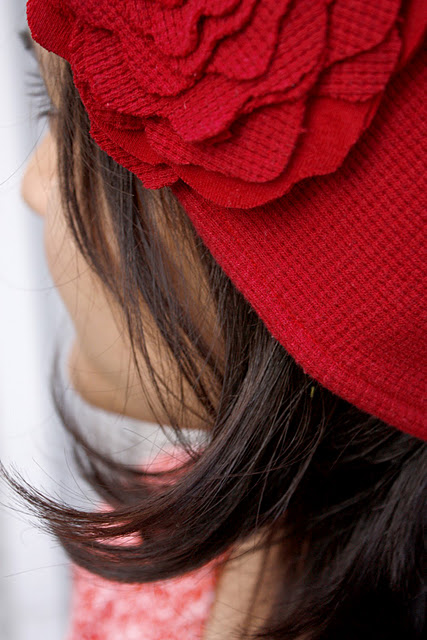
For this wool ear warmer I cut randomly shaped flowers, stacked them, and then placed them cascading to one side.

I simply hand sewed each stack of flowers right through the center and pulled it tight so the flowers would pucker up a bit.
I used the same technique for the other two flowered ear warmers; but also added a few extra hidden stitches to the thermal knit one to hold the large flower in place so it wouldn’t flop around.
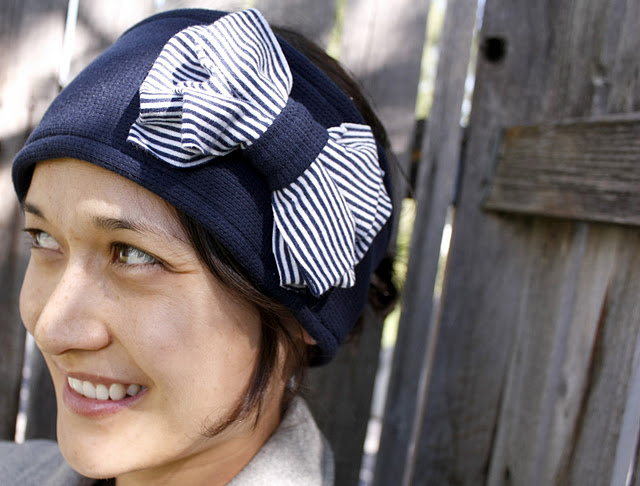
The bow is done similarly but with a lot of hidden hand sewn stitches at the back of the bow. I made about 10 doubled up stitches at the back of this one. I would just do one stitch, go through twice or more, knot it off and then move onto the next one.
All done.

No comments:
Post a Comment