
Keep it Safe (and pretty) Envelope
Supplies:
- Two pieces of fabric that will accommodate your rectangle dimensions (1/4 yards or scraps will work)
- Snap, button or velcro
- 7" of skinny elastic or FOE (Fold Over Elastic-- bolt has bins of it!)
- Optional interfacing/interlining
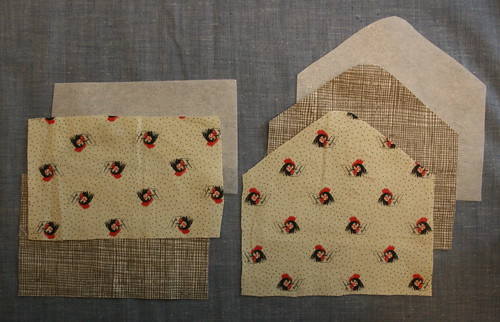
Cut one rectangle out of each piece of fabric 6 1/2" by 4 1/2" (front)
Cut one rectangle out of each piece of fabric 6 1/2" by 7" (back)
Trace an existing envelope flap or use the following diagram as a guide, draw a cut line onto the wrong side of the skinny end of A. 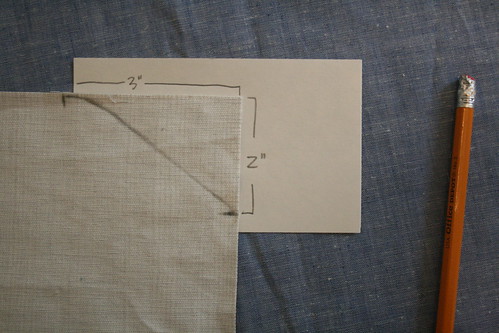
2. Sew
Make the interior and exterior envelopes separately. With right sides together and bottom edges matching, sew front to back around the three sides of interior. Use a 1/4" seam allowance. Pin elastic across the right side of exterior back. You might also try interfacing or other interlining on the wrong side of your exterior envelope, for extra stiffness.

You need to decide how you would like to close your envelope and attach it to the sewn exterior. I used a snap for this one, but I like velcro/hook and loop tape better. A loop and button would be pretty, too (pin loop to top curve exterior, facing inward on right side and sew the button to the front after the envelope is completely assembled.)
For final construction, place your interior and exterior inside of one another, right sides facing. Begin sewing along front edge and around top, leaving a 1 1/2" gap in your stitching line (along front). Turn envelope right side out through small gap. Top stitch gap closed and around entire top edge.
No comments:
Post a Comment