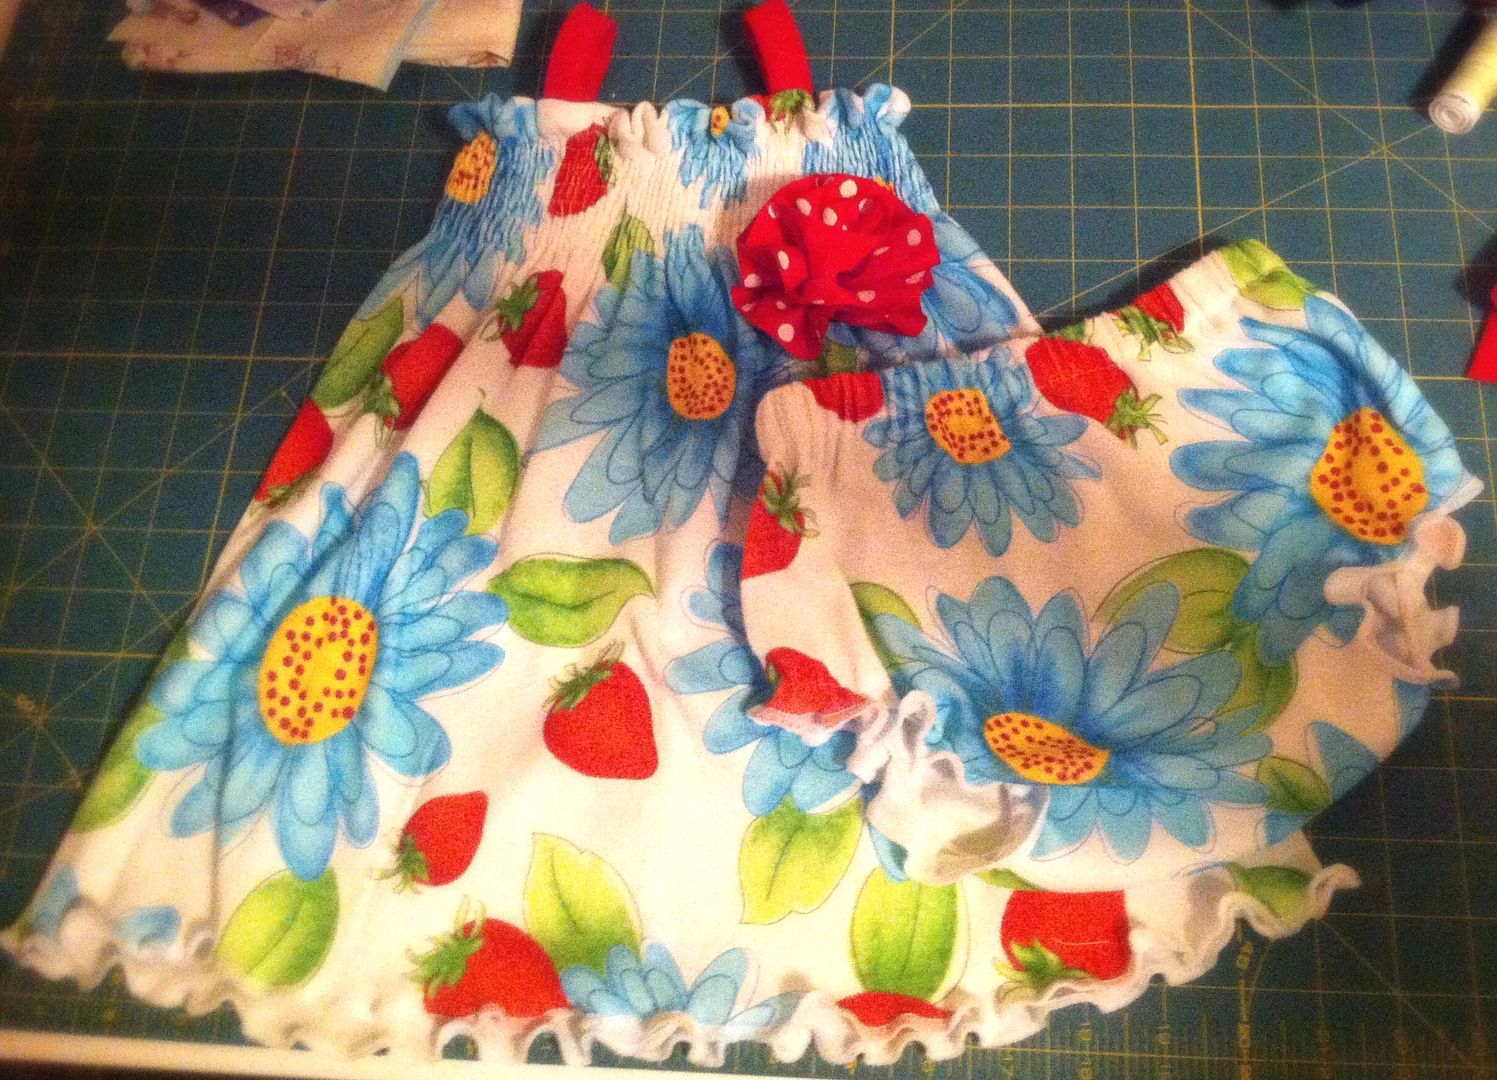
his is a perfect little dress and bloomer set for babies and toddlers for the summer. It’s made of knit, so it’s comfy and perfect to throw on in a hurry.
The pattern for the bloomers can be downloaded here. The dress has no pattern piece because it is a rectangle. The chart below gives you the measurements to cut your dress for each size. Make sure your widest stretch goes with the width.
ONE NOTE: The 6-9 size is really 6-12 month size. I’m just an idiot and labeled it wrong on the bloomers pattern.
Dress Measurement
| |
Size
|
Width x Length
|
0-3 m
|
34 x 12 inches
|
3-6 m
|
36 x 13 inches
|
6-12 m (6-9)
|
38 x 15 inches
|
12-18 m
|
40 x 16 inches
|
18-24 m
|
42 x 18 inches
|
Strap Length
| |
0-3 m
|
4 x 3 inches
|
3-6 m
|
4 x 3 inches
|
6-12 m (6-9)
|
5 x 3 inches
|
12-18 m
|
6 x 3 inches
|
18-24 m
|
8 x 3 inches
|
Recommended fabric: knits, interlock, jersey, rib knit
Materials
Shirring elastic
1/8 inch elastic (you can substitute 1/4 inch)
1/2 inch non-roll elastic
1 yd of fabric for dress
Fat quarter size of same fabric or coordinating for bloomers
Two large scraps coordinating ribbing – The stretchiness needs to be lengthwise according to the chart above. For example, the stretch should be for the 8 inch length in the 18-24 month size.
If you would like to make the matching pin or a flower headband, please see this tutorial here. To turn this into a pin, just glue a pin backing to the felt instead of attaching to headband.
**I made a lot of this dress on a serger. If you don’t have one, you can still make it on a sewing machine, but you won’t be able to make the lettuce edges on the dress and bloomers.

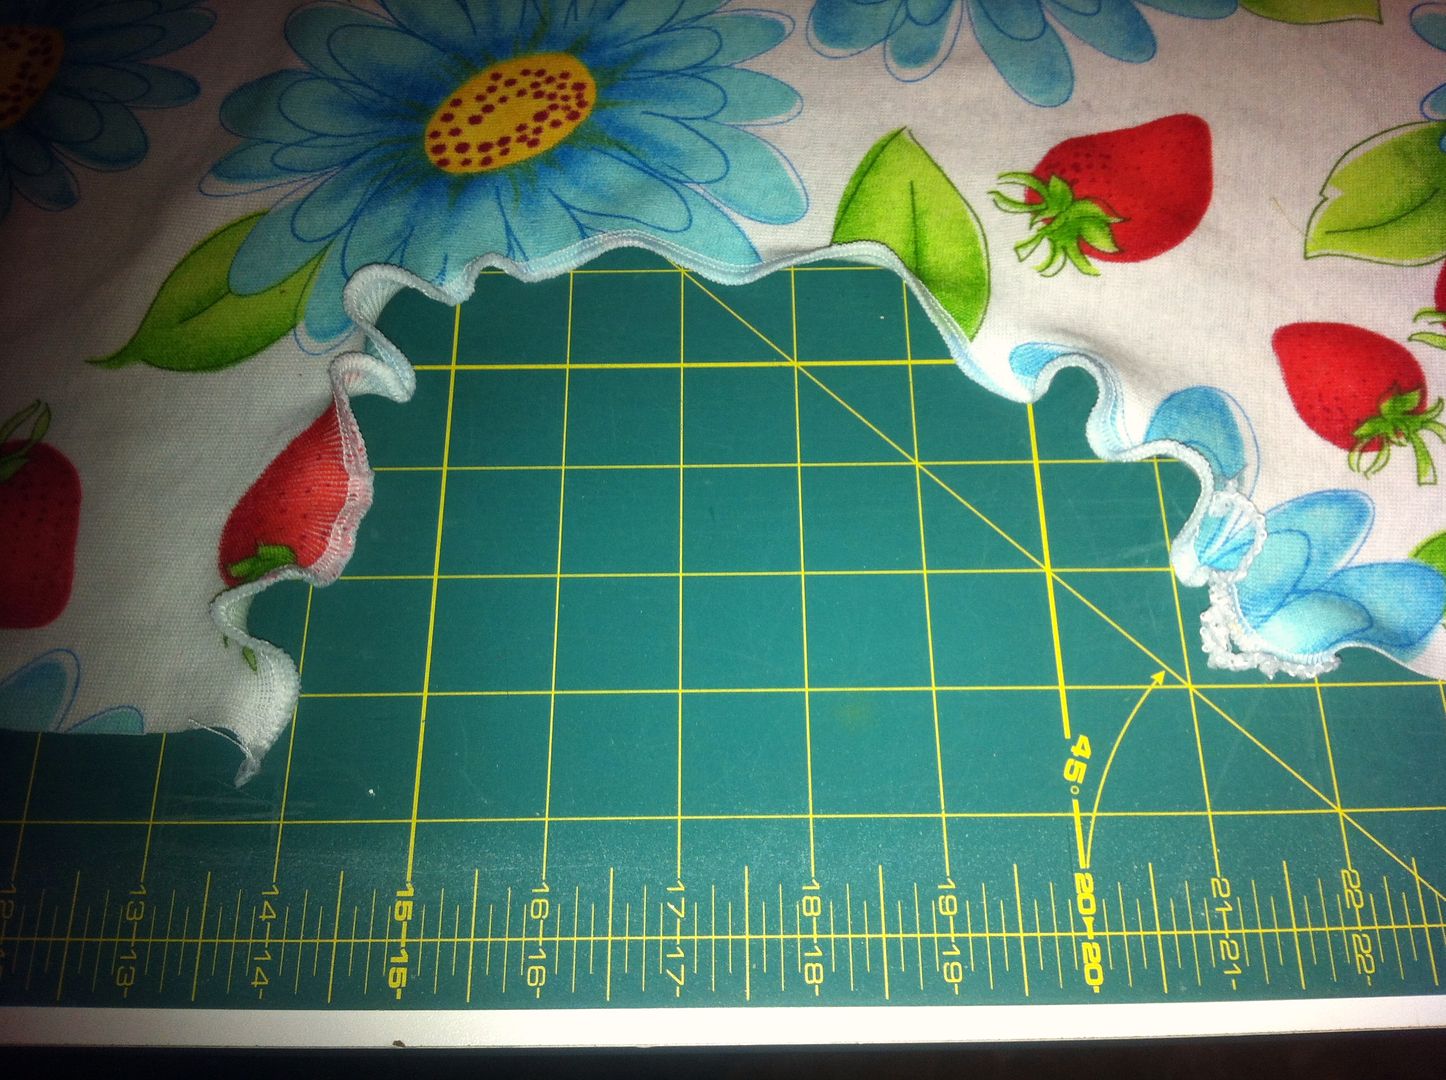
1. If you have a serger, lettuce edge the hem of the dress. If you do not know how to do this, look at your instruction booklet for your serger and determine the settings for a rolled hem. After setting your serger to the rolled hem, insert the bottom hem of your dress and begin. As you serge, stretch the fabric and you will begin to see it become wavy as it goes through.
If you do not have a serger, just make a small plain hem.

2. Hem the top of the dress.

3. Fill a bobbin with shirring elastic. You will shirr the top of the dress while sewing the right side of the fabric as shown in the picture.
Line your presser foot edge with the hem stitch line and begin shirring. Stretch the fabric some as you shirr, so that as you finish, it begins to gather. As you start shirring a new row, line your presser foot up with the previous shirred row. Continue shirring for several rows. Make sure to leave excess thread at each row. Then as you create more shirred rows, pull slightly on the excess threads to gather the shirring more.
Below is a chart for recommended shirring rows for each size.
Shirring Rows
| |
0-3 m
|
6 rows
|
3-6 m
|
6 rows
|
6-12 m (6-9)
|
7 rows
|
12-18 m
|
8 rows
|
18-24 m
|
9 rows
|

4. Once you have sewn all rows, put the right sides together of the dress. This will create a seam at one of the sides of the dress. Make sure you match up the shirring rows. As I sew the seam, I usually do some back-stitching to tack the shirring so it doesn’t come loose. Then cut the threads of the shirring close to the tacking.

5. To make the straps, take your two pieces of rib knit. Unlike the dress, they should be the most stretchy LENGTHWISE. You will fold them into thirds like above.

Then you will fold them in half once more to hide the raw edge.

Sew each strap closed like above.

6. Try the dress on your daughter and mark the placement of the ribbing straps. There will be some excess to each strap edge, which you can cut off after sewing them on.


If you can’t try it on a child, sew the straps and leave an excess of about 1/2 inch to 1 inch at each raw edge.
When I sew the straps, I like to sew them on the hemline of the top of the dress and I tack them so they are secure. Usually, they will fit nicely about 2 to 2.5 inches from the center of the dress on either side. If they are attached too far to the side, they tend to fall off the shoulders.

7. On to the bloomers…download the pattern. It can be found at the top of this post. You will need to tape it together at the points indicated, and only cut one piece.
My kids wear cloth diapers, which are bulkier than disposable diapers. Therefore, I designed this to fit cloth diapers, so if your child wears disposables, it will be a little big, and you could probably go with the next size down.

8. If you have a serger, use the rolled hem to lettuce edge the legs of the bloomers. If you don’t have a serger, just sew a small hem on the legs.

9. Attach the 1/8 inch elastic about 1/2 inch from the edge of the legs. Make sure you leave a little above the side seam where you start attaching it, so you will catch some elastic in the side seam.
Remember to stretch the elastic as you sew, so that it will not be loose on your baby’s legs. Don’t stretch it extremely tight so that it doesn’t cause red marks on their legs, but also don’t NOT stretch it, otherwise it will be loose.


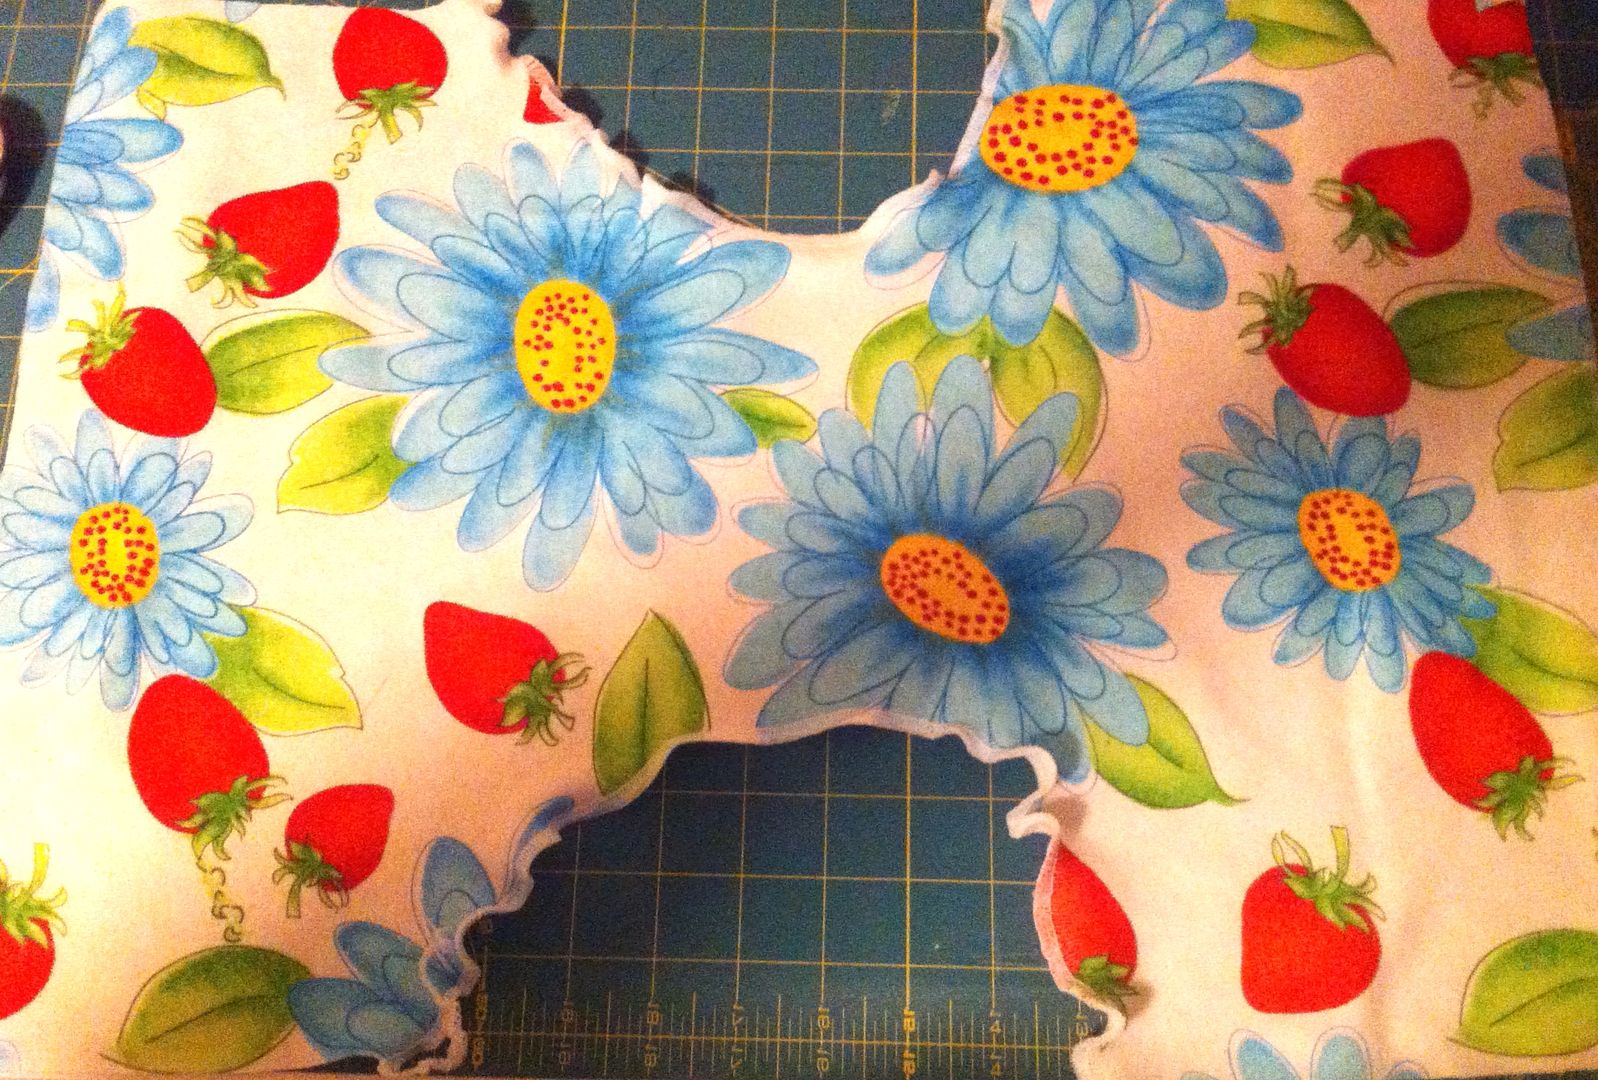
10. Put right sides together of the bloomers, matching the side seams. Start at the leg and sew the side seam all the way to the waist.

Once you sew both side seams, it should look like above.

11. To finish up your bloomers, we just have the waistband. Sew a casing for the elastic waistband, but make sure to leave 1-2 inches unsewn to insert your elastic.
Measure your child’s waist and subtract 1-1/2 inches and cut the elastic. If you need a chart, there is one below to cut your elastic.
Waistband Elastic
| |
0-3 m
|
16 ½ inches
|
3-6 m
|
17 inches
|
6-12 m (6-9)
|
17 ½ inches
|
12-18 m
|
17 1/2 inches
|
18-24 m
|
18 1/4 inches
|
12. Insert the elastic into the casing using a safety pin. Make sure to leave one end of the elastic out. Then, pull through, overlap the elastic and sew it together. Then sew the casing closed.
You’re finished!!
No comments:
Post a Comment