Now your little ones can carry your heart with them wherever they go. I had so much fun making this heart-shaped bag and I can’t wait to give it to little Scarlet on Valentine’s Day.

but the pressure is on. Hope I can make it live up to her expectations, let me know if you have any ideas or suggestions.

I made this bag with canvas for the straps and lining (so it’s nice and stuff) and a cotton print for the outside. If you choose to do yours in all cotton, you’ll want to also cut two pieces of interfacing in your heart shape and iron to your cotton facings.

Notice the mark for the dart. We’ll come back to that.

Cut two pieces for the outside of your bag, and two for the inside.

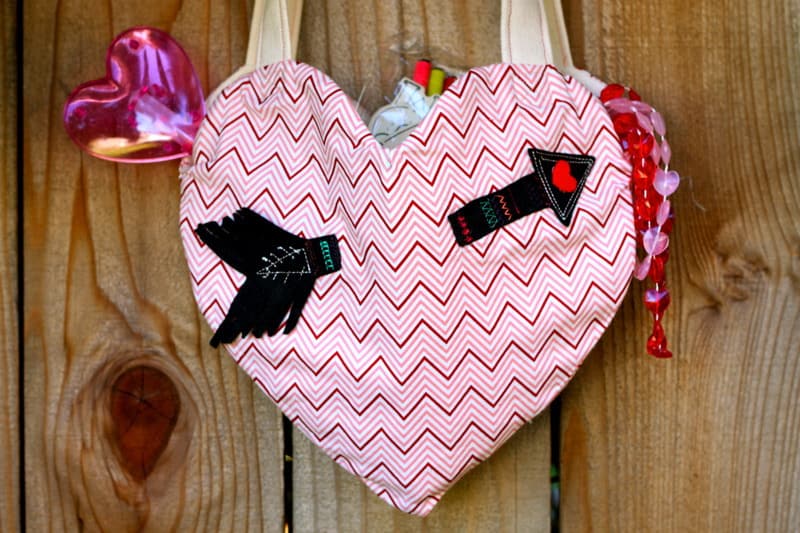
If you want to add an arrow like I did, go ahead and cut the pieces out of felt.

Start with the piece that will be the front of your final bag, and place your arrow pieces on top.

I sewed in place with some regular sewing machine stitches in a bunch of different colors to mimic a vintage-y style arrow. I also glue a felt heart to the tip.

Now you want to turn your hearts over and lay the pattern aligned on top. Fold the pattern back at the dart line like so:

Trace the dart line, where you folded the pattern:

Repeat on the opposite side of the heart, then draw a straight line from the tip of the v to the point where your two darts lines meet:

Fold the heart in half, right sides facing, using the straight line as a guide, and sew up the dart line you drew:

Cut off the excess fabric from the dart:

Repeat on both outer hearts and your two lining hearts (here on my canvas):

Set all your hearts aside and let’s make our straps. I am using straight canvas for my straps, but if you are using cotton, iron interfacing first. So start by folding in half along the length and ironing:

Then open up the strap, fold each side into the center and iron:

Then fold in half once again, and iron again:

Now sew up the open side of the strap (i used pink thread for fun):

Then sew the other side:

Repeat to make one more strap.
Repeat to make one more strap.
Now lay the front of your bag right side up and use the pattern to mark where your strap will go on each side.

Sew one end of your strap to each side an inch from the end of the strap:

Make sure the same side of the strap is up on both sides (you don’t want a twisted strap):

Now lay your lining piece right side up, put your front piece with the straps sewn on right side down on top. So right sides are facing. Carefully pin the lining and front together:

Pin around the top and stop on each side at the X marks on the pattern.

Sew in place from one X mark to the other, about 1/2″ from the edge:

Clip the curves really well:

Then flip it inside out, and iron the seams flat. You’ll also want to iron the un-sewn edges under:

Repeat to make the other side of your bag:

Here’s a pic to show you how the unsewn edges are ironed under. This helps give us a guideline when we sew them together later.

At this point, re-inforce the straps by top-stitching a box with an X in the middle at the base:

Now lay your front and back bag pieces right sides facing:

Lift the lining out of your way, and pin the outside pieces of your bag together right sides facing:

Sew them together along the ironed line we made earlier:

Now your bag looks like this:

Flip the sewn together outer bag right side out, but leave the lining as is. You can pin together, but canvas is hard to pin so I used clips. 
Now, if you are not lazy like me, you could slip stitch the lining closed – then you would have a fully reversible bag (nice), but it was late so I sewed the lining closed with a straight stitch:

So here we are

Flip the lining to the inside and give it a good iron. You’re done!

Stuff with treats.

Feel the love.
No comments:
Post a Comment